
Communicating with customers through email is a great way to showcase your brand and tell its unique story. Add your own images and logo, or edit colors, fonts, and design layouts the way you prefer.
OVERVIEW
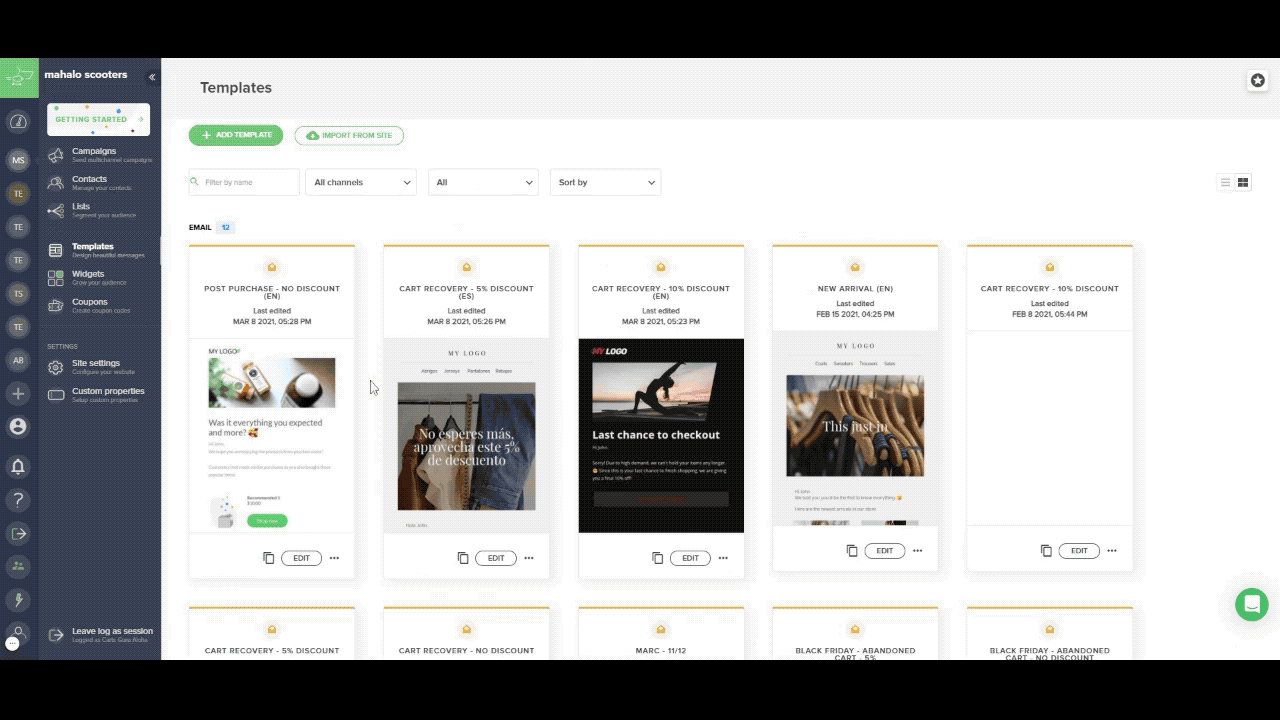
To create your email template, go to the app menu and click on:
Templates -> + Add template -> Email
Next, select the language of your template and the base template most relevant for the campaign you’re creating.
After clicking Create template, your email draft will open.
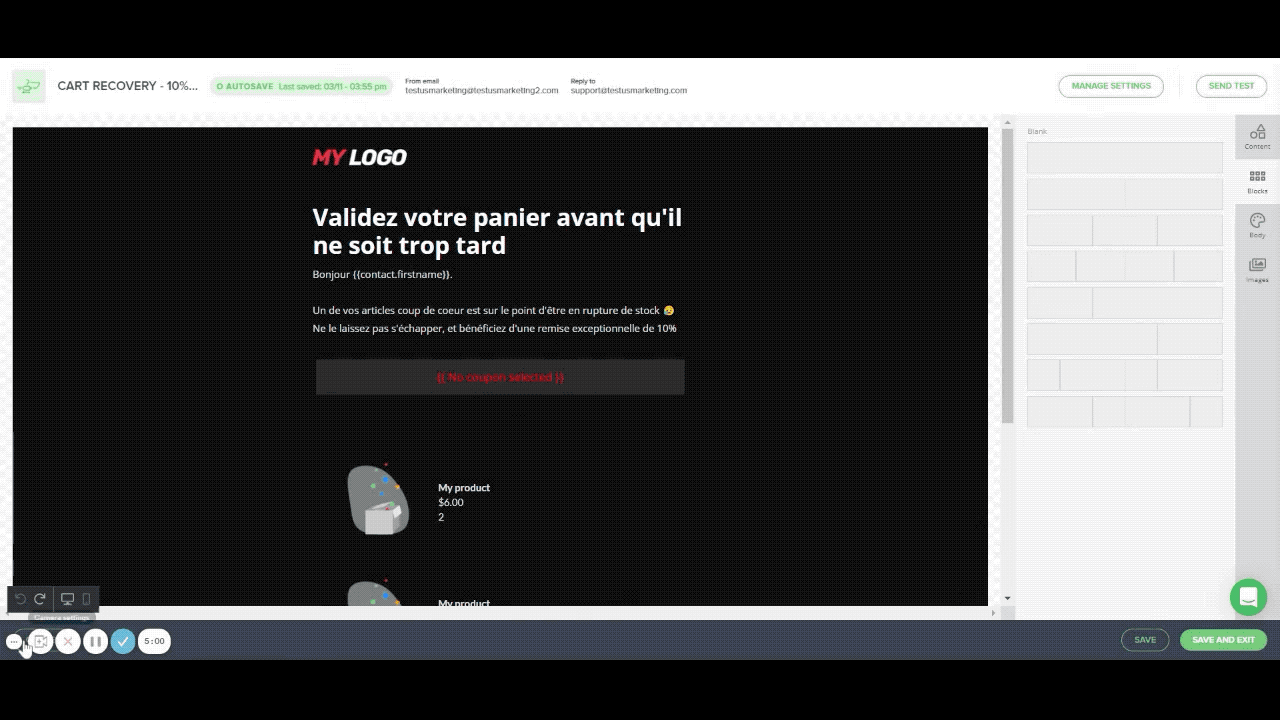
Click on the ‘Manage settings' on the top right. Here you can edit your template name and the email settings, including the sending email and the reply-to email. You can also add a subject line, a UTM tracking code, and use the option to send yourself a preview email.
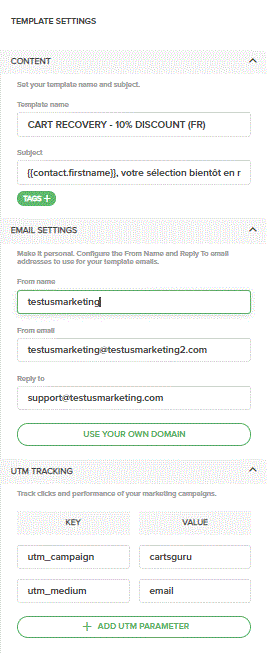
Once you’ve filled in the settings page, hit Save and your draft will open up again.
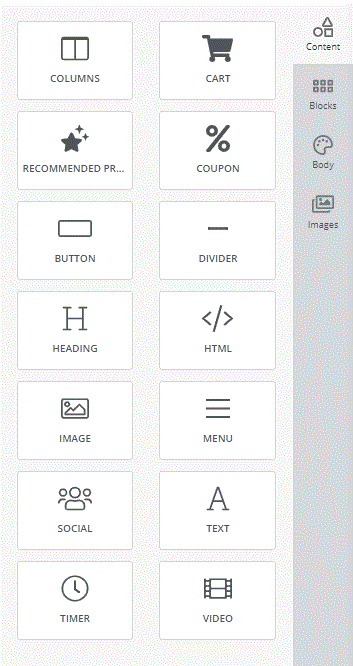
On the right is the sidebar tools menu with four options. The 'Content' tab is where you choose the optional sections that can be dragged and dropped wherever you would like within your email. The 'Blocks' tab is to organize your template in different columns where you'll drag and drop your Content. In the 'Body' tab, you can set the general settings of the design of your template. Finally, the 'Images' tab has a library of images that you can add to your template.
STEP-BY-STEP GUIDE
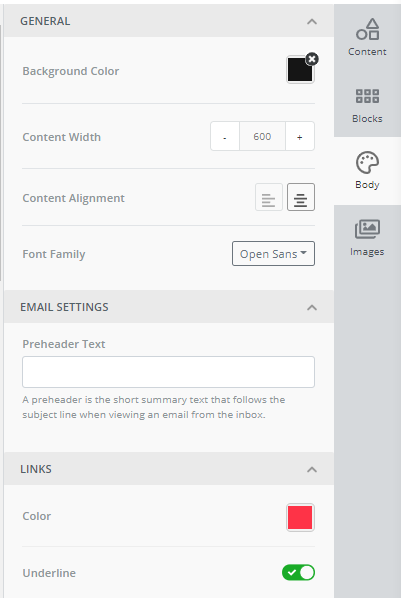
1. Click on the Body section to select the background of your email, block sizes, URL colors, or to set the pre-header your client will see when they receive the email.
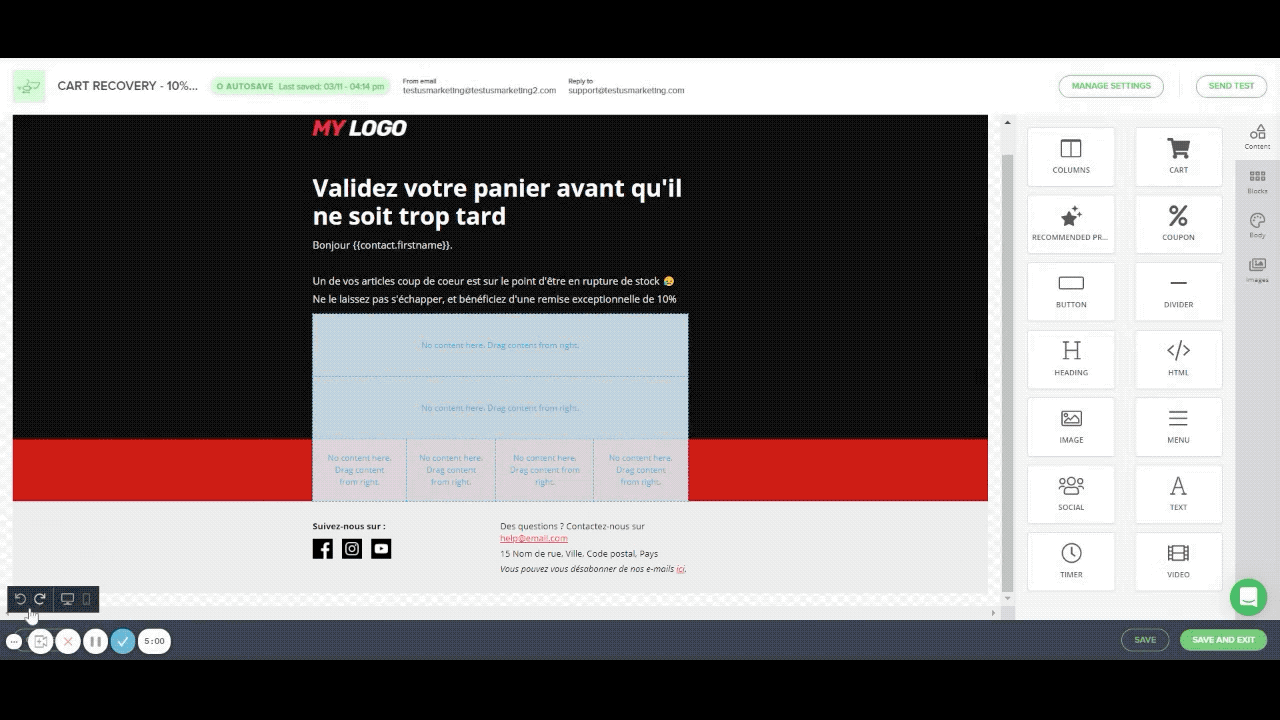
2. Define the structure of your template by adding Blocks.
You need to add a Block before you can add anything from the Content tab. If you don't want to structure your template in different columns, add just one block and add all the content to the same block.
3. In the Content tab, the first drag-and-drop option is 'Columns'. Simply drag a column into the template and position it wherever you’d like, and then click it to customize. The column allows you to add a row to the template which you can organize into columns as a block.
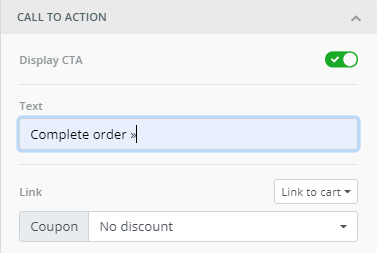
The next option is 'Cart'. This is a must-have for a cart retargeting campaign, as it will display the products a customer abandoned in their cart. In this section, you can also customize the CTA to redirect your customer to their cart. If you want to offer your client a discount, you should add it to the CTA so that it will be embedded in the link and the customer will find it already applied to their cart.
The next section is 'Recommended Products’. These are automatically by Carts Guru. We look at the customer’s history of past purchases and items they’ve shown interest in and select three products accordingly.
You can edit the look of the ‘Recommended Products’ section: change the colors, fonts, and margins.
Under the 'Coupon section', you can choose one of the coupons you previously created in the Coupon tab and have it displayed in your email.
The 'Button' lets you add a CTA (call-to-action) to your email. There are many ways you can customize your button: change the colors of the background, edit the font and color of the text, or of the embedded links. You can also change the size of the button and the margins around it.
The ‘Divider’ feature improves the aesthetics and readability of your template. Drag it wherever you would like a line between sections of your template. Click the line to edit the color, size of the divider, or the margins around it. Under ‘line’ you can also edit the line itself, making it dotted for example.
The 'Header' includes text that can be dragged and dropped wherever you’d like in the template (although we recommend placing it at the top of the page).
In the 'Menu' section, you can reproduce the menu on your ecommerce website and redirect the customer to the different sections of your website by clicking on the text.

Drag the 'Social links’ section into your template, click on it, and add the links to the social sites you want to display. Once you insert the link, the corresponding social media icon will automatically appear on the template. Once you've selected all the social sites you'd like to link, you can edit the colors of the section, as well as the icons themselves (under icon-type).
If you have additional text that you would like to add anywhere within your email, just drag a 'Text' section into your template. You can edit the design of the text box, add whatever content you would like, and insert any tags about the contact or cart details, or add a discount code.

A very nice section to add to your template when a launching a time-sensitive promotion or discount is the 'Timer'. In this case, you should set the Time Zone and the End Time of your promotion.

Last, but not least, is 'Video'. Add the URL of a video you want to add to your template and a preview image of the video will be displayed in the template. Once the customer clicks on it, they will be redirected to the video.
If, at any time, you would like to remove a section from the template, just click on it and then click on the bin icon. If you want to duplicate it, click on the copy button.

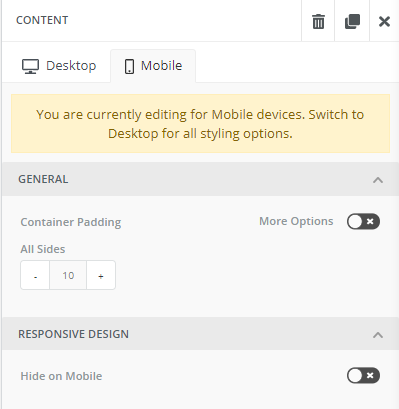
Our templates are responsive! If you want to hide or display a section in a different way on mobile, just click on the Mobile tab of the content and customize it.
4. To add a picture to your email template, click on the Images tab in the sidebar. Drag the image section and drop it wherever you’d like to place it in your template. Click the image block and some options will open. You can select, add and edit your image. By clicking ‘Apply effects and more' you can resize your image and change its style. We recommend embedding a clickable link in the image. If you aren’t happy with the dimensions of the image, you'll have to crop it to your desired size before uploading it into the template.
 Once you’ve finished adding all of the drag and drop sections to your template, it’s ready to save and send to customers. Happy marketing!
Comments
0 comments
Please sign in to leave a comment.